
Garbage disposals are a convenient kitchen appliance that helps in getting rid of food waste easily. Installing a garbage disposal may seem like a daunting task, but with the right guidance, it can be a straightforward process. In this step-by-step guide, we will walk you through the process of installing a garbage disposal installation effortlessly.
Materials and Tools Needed
Materials:
- Gasket
- Mounting Ring
- Garbage Disposal Unit
- Discharge Tube
- Power Cord (if not built-in)
- Plumber's Putty
- Wire Nuts
Tools:
- Adjustable Wrench
- Screwdriver
- Hacksaw
- Bucket
- Tape Measure
- Electrical Tape
Step-by-Step Installation Guide
1. Preparation
Before starting the installation process, make sure to turn off the power to the disposal unit at the circuit breaker. You should also disconnect the drain and any existing disposal unit. Place a bucket underneath the sink to catch any water or debris that may come out during the process.
2. Mounting the Disposal Unit
- Place the gasket and mounting ring in the sink hole and secure them in place using a wrench.
- Attach the disposal unit to the mounting ring by twisting it into place. Make sure it is securely fastened.
3. Connecting the Discharge Tube
- Connect the discharge tube to the disposal unit's drain outlet. Use a screwdriver to tighten the clamp and ensure a secure connection.
- Connect the other end of the discharge tube to the drain pipe coming from the wall. Use a hacksaw to trim the tube if necessary.
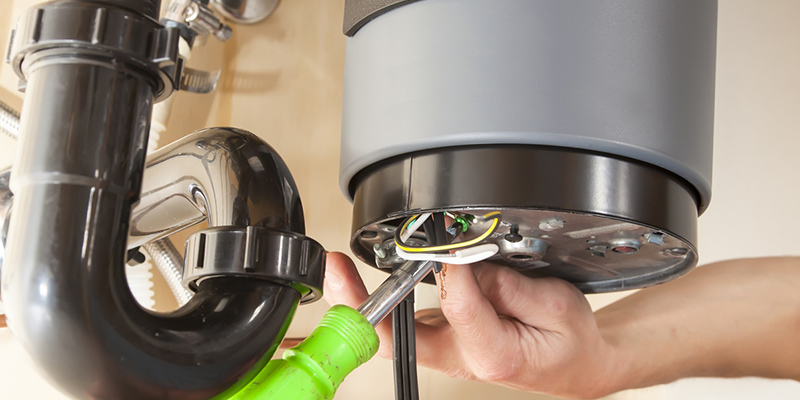
4. Wiring the Power Cord
- If the disposal unit does not come with a built-in power cord, you will need to wire one yourself.
- Follow the manufacturer's instructions to properly connect the power cord to the disposal unit. Use wire nuts to secure the connections and electrical tape to cover them.
5. Testing the Installation
Once everything is securely in place, turn the power back on and test the disposal unit. Run water through the sink and turn on the disposal to check for any leaks or issues. If everything is working properly, your garbage disposal installation is complete!
Tips for Maintenance and Care
Regular Cleaning:
- Keep your garbage disposal clean by regularly running cold water and a small amount of dish soap through it.
- Avoid putting large or hard items like bones, fruit pits, or coffee grounds down the disposal to prevent clogs.
Odor Prevention:
- To prevent odors, you can grind citrus peels or ice cubes in the disposal to keep it fresh.
- You can also pour a mixture of vinegar and baking soda down the disposal to eliminate any lingering odors.
Clog Prevention:
- Avoid putting fibrous or starchy foods like potato peels, celery, or pasta down the disposal, as they can cause clogs.
- Run cold water for a few seconds before and after using the disposal to help flush out any remaining debris.
Conclusion
Installing a garbage disposal can be a straightforward process with the right guidance and tools. By following this step-by-step guide, you can effortlessly install a garbage disposal in your kitchen and enjoy the convenience it offers. Remember to follow maintenance tips to keep your disposal running smoothly for years to come.